🚀 Homelab Build Journey: Building a Virtual Security Lab with Proxmox
TL;DR: Plain-English build story of the lab: how I chose hardware, validated images, segmented the network, and added secure remote access. Highlights repeatable steps and risk-thinking that non-technical stakeholders can follow. Outcome: validated Proxmox install with checksums/GPG and network segmentation completed day 1.
This page is a write-up of how I planned, built, and secured my homelab. It complements the Homelab Infrastructure (Summary) by documenting the full journey — from hardware selection to ongoing improvements.
🎯 Purpose
This lab serves as my personal testing ground where I can safely: - Experiment with security tools and configurations
- Practice incident response scenarios
- Learn new cybersecurity techniques
- Test solutions before applying them in production
📋 Planning Phase
Just like in a professional deployment, I started with careful planning:
- Researched the best hardware for my needs (settled on the Beelink SER5 Mini PC)
- Created a checklist to avoid oversights
- Designed for security-first from day one
- Documented each step for repeatability
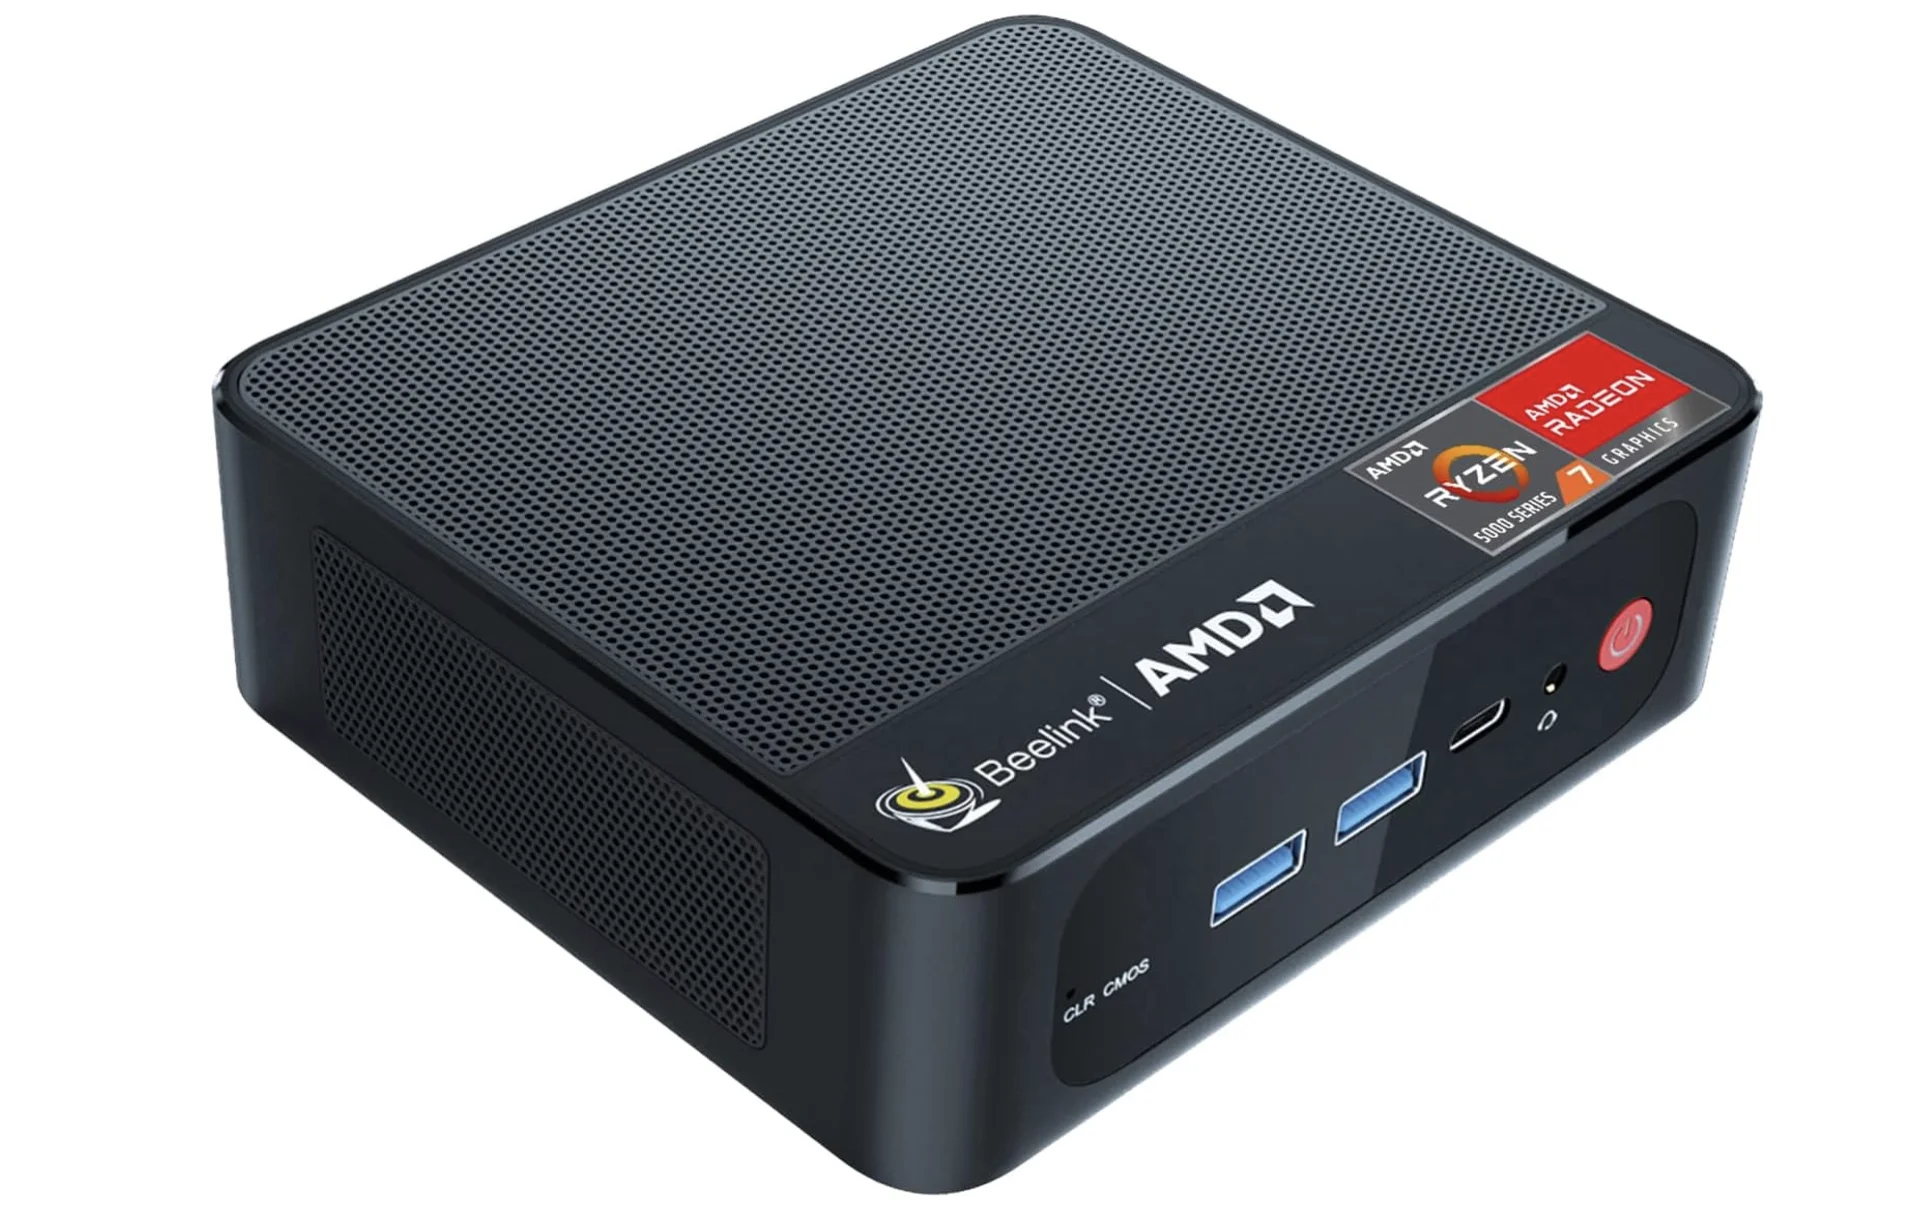 Beelink SER5 Mini PC : Chosen as the base system for virtualization and SOC tools deployment.
📝 Step-by-Step Implementation
1. Getting Started
- Downloaded Proxmox VE from the official site
- Verified SHA256 checksum for integrity
- Validated GPG signatures
- Created bootable media with Balena Etcher

Proxmox Installer : Verified image and bootable media.
2. BIOS Setup
- Accessed BIOS (Delete/F2/F10 on startup)
- Enabled virtualization features (AMD-V)
- Adjusted boot sequence for USB install
- Saved hardened configuration

BIOS Settings : Virtualization and security features enabled.
3. Installation & Security
- Installed Proxmox VE with strong admin credentials
- Configured secure authentication defaults
- Applied immediate post-install updates
4. Network Setup
- Configured pfSense firewall
- Created VLAN segmentation for isolation
- Applied firewall rules for remote access
- Added monitoring for visibility
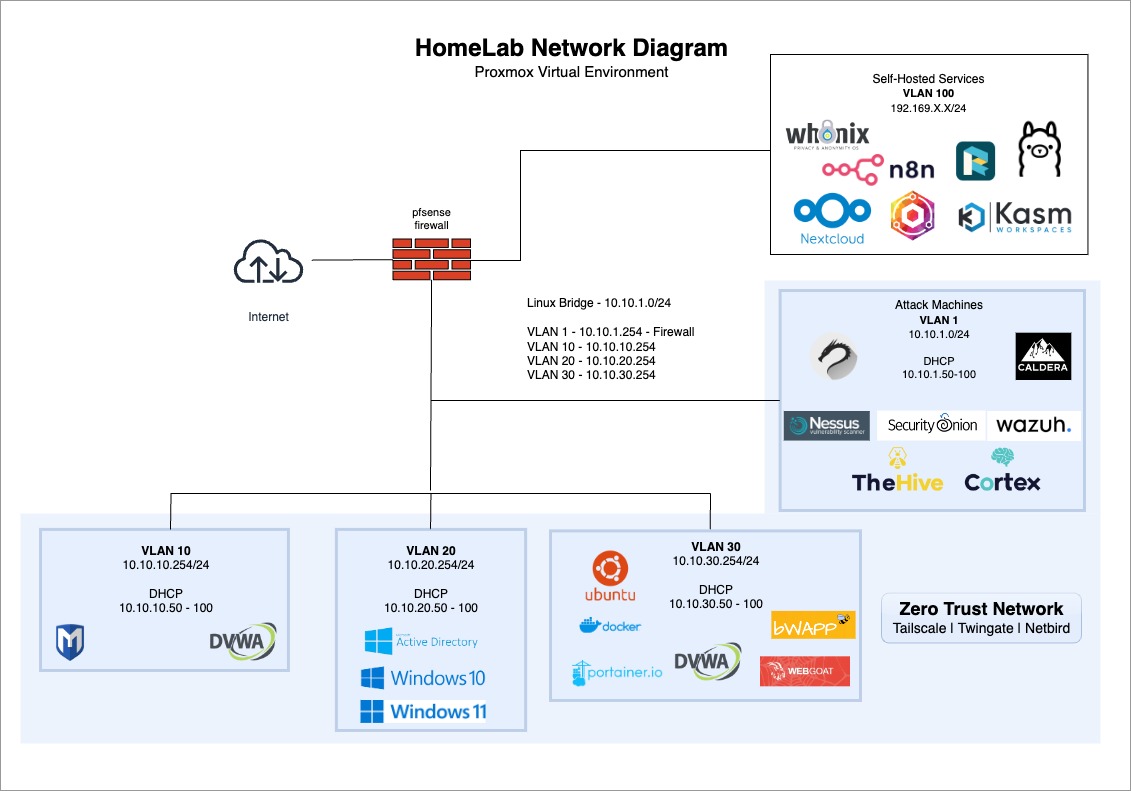 Homelab Network Diagram : Segmented VLANs for red/blue teams and shared services.
5. Ongoing Hardening
- Applied rolling updates and patches
- Introduced backup policies
- Layered extra security controls over time
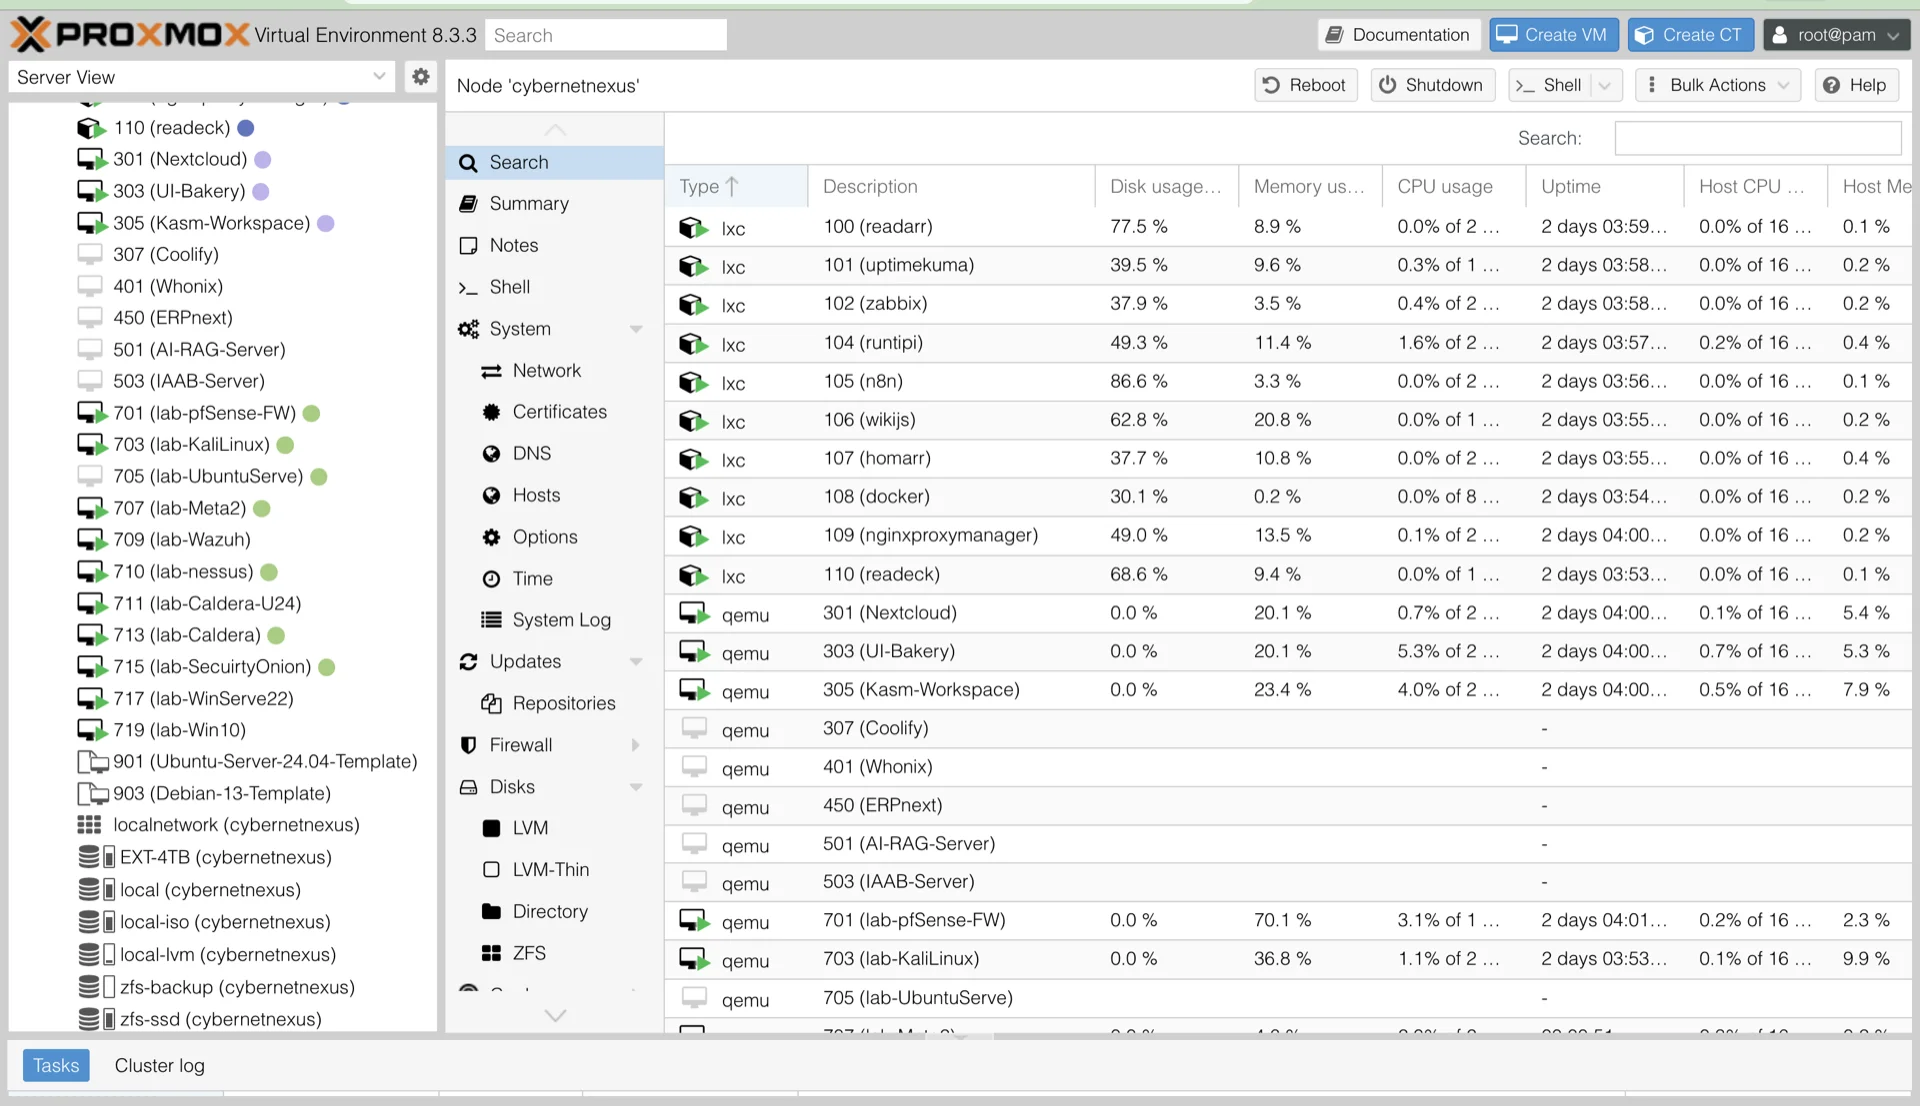
Proxmox Dashboard : Active SOC, red team, and service VMs.
📈 Project Impact & Growth
🧠 Key Learning Outcomes
- Infrastructure Management → virtualization, monitoring, and secure administration
- Security Implementation → SOC deployment, vuln scanning, incident response
- Professional Development → documentation, problem-solving, project management
⭐ Ongoing Improvements
- Adding advanced SOC integrations (SIEM, IDS tuning)
- Expanding self-hosted services with automation (Ansible, CI/CD)
- Optimizing performance monitoring and backups
💼 Professional Applications
This journey demonstrates practical ability to:
- Build secure and scalable infrastructures
- Deploy enterprise-grade SOC tools in a lab setting
- Document and communicate technical processes clearly
- Translate lab work into real-world security operations skills
📌 Key Takeaway
What began as a personal experiment matured into a comprehensive homelab platform. This project reflects my ability to plan, secure, and operate complex environments while documenting the journey with a professional, security-first mindset.